
Using your starter: sourdough pizza dough
It has been a week. Somehow we’ve stumbled to Friday, but I’ve been sick with a wretched cough/fever/ache-in-the-joints that has been rather unpleasant for everyone. Though I did spend yesterday afternoon curled up on the couch, reading with the three-year old (that’s right, with – not to), which was cozy and quiet and wonderful. The sun, which had emerged for a glorious stretch and inspired over-enthusiastic front garden clearing, has retreated, and we are back in the grey and damp. Whine whinge whine whinge whine. It is Seattle, it is March, this whinging and whining should not be a surprise. Nor should the weather, but there you have it.
Earlier this week, before the virus took hold and crushed my will, we had pizza night. Ordering in pizza has its own virtues, of course – a night off from cooking and the novelty of a box of warm cheesy goodness arriving at the door as if by magic. But, assuming you’ve done some work ahead of time, making your own is surprisingly quick, leaves little dishwashing behind, and makes everyone around the table happy. At least, it makes everyone around my table happy, which is only true of three meals total, so pizza is in pretty high rotation around here.
I’ll tackle the sauce in another post, but I use a modified version of this Instant Pot marinara, which is delicious and deceptively healthy, what with the red lentils and the sweet potato creeping around in it. It also freezes marvelously, making pizza a particularly quick option. I like to “bake” pizza using my outdoor gas grill, which I like to pretend behaves like a super high heat wood-fired oven, aka the ideal pizza cooking vessel. To grill, I use this method from Simply Recipes, and it works a treat.
This post is all about the dough. Though, full disclosure: I have yet to develop my own *perfect* recipe. This one is good, the dough gets crisp and tastes as pizza dough should, and it stretches well, not bouncing back the way so many do, only to leave you losing your mind with frustration with your pancake-sized pizzas. It requires some forethought, and some patience while you are working with it, but it is my current go-to.
It is slightly adapted from the King Arthur website, the main difference being the exclusion of the instant yeast, and therefore a change in how much time is required. I’m not snobby about such things (ha, ok fine, I’m pretty snobby about it, but with absolutely no basis for said snobbery), but I don’t really see the point in making a sourdough pizza dough with instant yeast. I mean, I guess it’s faster, but it’s my understanding that the instant yeast will completely overtake your beautiful wild sourdough yeast, and why would you want to do that when you’ve spent so much time and effort nurturing your proud starter? [Sidebar: do you have a sourdough starter? You should!]
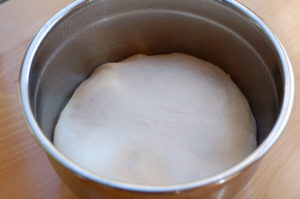
Before you start, a few things to keep in mind: you want to use unfed sourdough starter for this, so make sure you mix up the dough before you feed your starter. You also want to give it plenty of time to rise; if you want to eat about 6pm, I find it to work best if you mix up your dough around noon and use the microwave trick (I will explain below) to let it rise all afternoon. Then you start shaping the dough around 5:15 or so. This gives the starter enough time to work its naturally leavened magic.
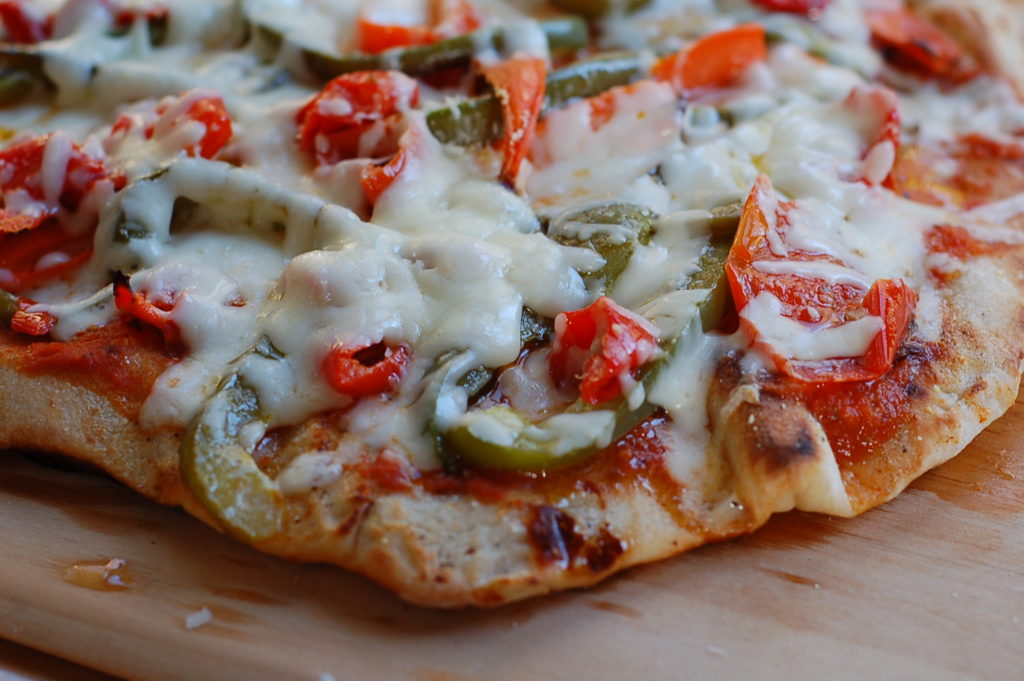
This recipe makes enough dough for two 12-15 inch pizzas, which is more than enough to feed my crew plus one other grown up guest. What toppings do you like to use? I often will make one plain (just sauce and a mozzarella/parmesan blend), maybe with some roasted broccoli or olives. The second one depends on my mood and my fridge, but often make a white pizza with ricotta as the base; this is good with thin strips of zucchini and basil leaves on top.
Sourdough pizza dough
Ingredients
- 1 cup unfed sourdough starter
- 1/2 cup lukewarm water
- 2 1/2 cups all purpose flour
- 1 1/2 tsp salt
Instructions
-
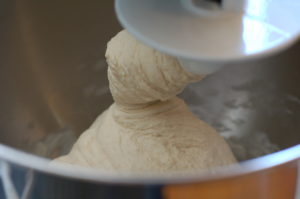
Put all ingredients into a stand mixer (if you have one). Use the dough hook to mix for about 7 minutes on medium. You want the dough to hold its shape and lose most of its stickiness. If you don't have a stand mixer, mix and then tip onto a well-floured surface. Knead until the dough is completely smooth and non-sticky.
-
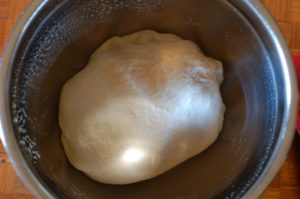
Once mixed and kneaded, put into an oiled bowl and cover.
-
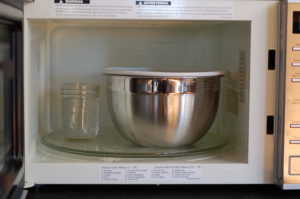
If your house isn't warm and humid, consider using your microwave as a proofing box. Place a small microwave-safe bowl or glass filled with water and heat on high for one minute. Reopen microwave and pop your covered dough into the microwave along with the heated water. Close the microwave and leave it alone. Don't actually microwave your dough! You're just using the warm, humid atmosphere as a proofing box.
-
Let rise for 5-6 hours. The dough should approximately double in size, though a little less (or a little more) will be fine.
-
Once risen, take the dough out and tip onto a well-floured surface. Divide into two equal parts and shape into neat balls. Leave alone for a few minutes. This is a great time to get your toppings prepared: cheese! sauce! veggies! pickled peppers!
-
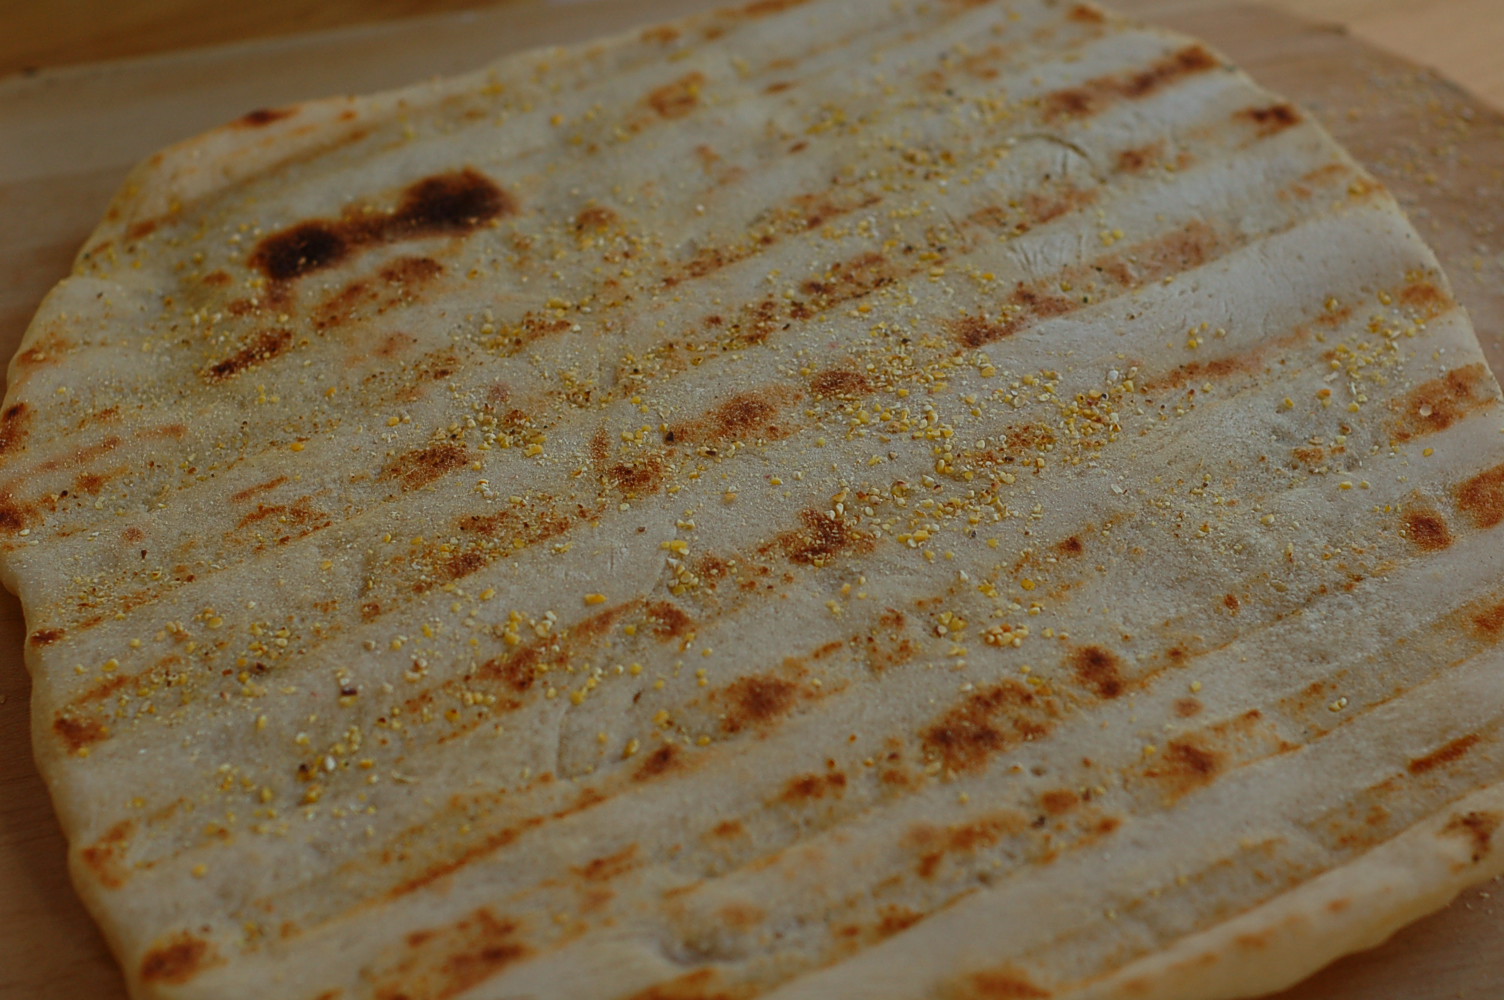
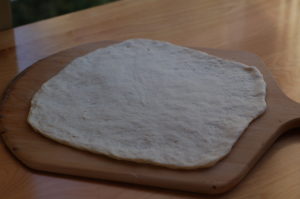
Once you have everything else ready, begin shaping your dough. I just use my hands to press it into a flat circle, and then let it rest for a few minutes. Then stretch it again. It should be between 12-15 inches in diameter. Transfer to a pizza peel or rimless baking sheet sprinkled with cornmeal, and then cook/top/consume as you wish. I highly recommend grilling.
-
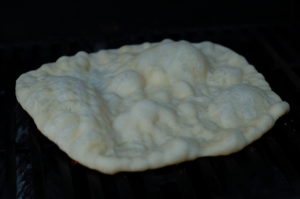
If you are grilling: before you begin shaping your dough, crank up the grill to medium-high heat. Scrape it down, and then hold a tightly folded paper towel dipped in olive oil with your grill tongs to wipe the grill with olive oil.
-
Once your grill is very hot - like too hot to hold your hand over for more than a second hot - slide your first UNTOPPED pizza round onto the oiled grill. Close the lid and wait 2-3 minutes, then check it. It should have bubbled up on the top and have nice grill lines on the underneath. Remove the pizza base, carefully.
-
Flip it over, drizzle or brush the grilled base with a little olive oil, and then top with your toppings. That's right: you are putting the toppings on the side that has already been grilled. Don't go crazy, or it will end up soggy. Slide it back onto the grill for another 2-3 minutes, checking after 2. Don't let the underside burn while you wait for the top to get super melty!
-
Remove from the grill, let cool for as long as you can stand it, and then eat while you do the same for the other pizza.
![]() What are your favorite pizza toppings? The one above boasts sauce, mozzarella and parmesan, roasted green pepper and carrot slices, and a healthy portion of Mama Lil’s Peppers, which are the greatest addition to any pizza ever.
What are your favorite pizza toppings? The one above boasts sauce, mozzarella and parmesan, roasted green pepper and carrot slices, and a healthy portion of Mama Lil’s Peppers, which are the greatest addition to any pizza ever.